Hi, I'm Brooke from Inside-Out Design and I'm so excited to be Kate's guest today!
I'm going to show you a project that I recently finished-
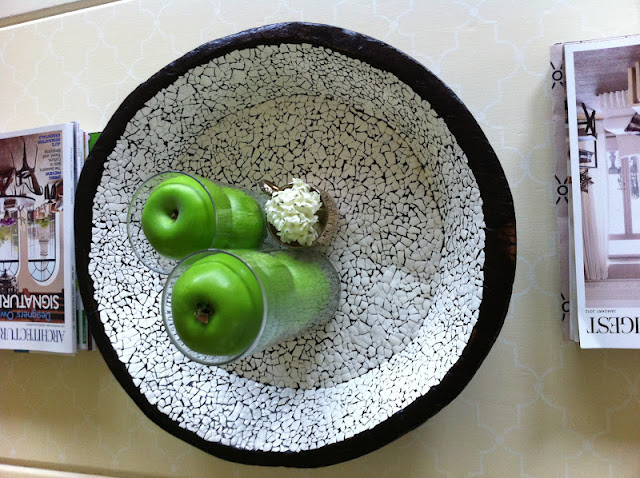
this bowl that I covered in an egg shell veneer.
With the arrival of spring, Pinterest is abound with tons of ways to decorate using eggs. I've been dying to get in on the egg action, but couldn't decide just how I wanted to incorporate them. Then, I was reading a magazine and came across an article about this company that does egg shell veneers on furniture, home decor, walls...pretty much anything. And I knew- this was how I was going to bring in the eggs. Bonus that it's something that's not actually springy and I can enjoy all year. (It's gotta be cause it's permanent!)
As soon as I set down my magazine I knew that the item I was going to be egging would be this big wooden bowl that I've been using as a tray on my coffee table.
To get started, I made 18 hard boiled eggs (I ended up using about 15 for this project)
...then it was time to get cracking.
Now, peeling an egg is normally pretty quick and easy right? But not for this project. You know how there's always that thin, kind of translucent membrane between the shell and the egg? That has to come off the shells, and it usually ends up stuck to the back of them. So I found that the easiest way to get rid of it was to just quickly peel my eggs, then let the shells dry out on the counter for a half hour or so till that extra layer dried out and felt more papery.
Then I peeled it off the back of every.single.shell fragment.
{If I haven't mentioned yet, this project is ridiculously time consuming. But so worth it!!}
So anyways next was the fun part- gluing down my shells. I used a craft glue that dries clear to attach the pieces of shell to the inside of my bowl, starting in the center and working my way out, and finding pieces that looked like they "fit" together, just like when doing any kind of mosaic.
As you'll notice in the picture three photos up, I started out with all my egg shell pieces in one bowl, but a while into this project I found it was easier to have one bowl with larger pieces and another with all the tiny pieces. That way when I needed the really small stuff to use as fillers I didn't have to dig to the bottom of the bowl (which is where they all migrate to) and it was easier to find the shape I needed.
Here are a couple in-progress shots:
And done!
I don't have a photo of my last step, but that was to go over this whole thing with two thick coats of Polycrylic to seal all the edges and make sure the shells wouldn't go anywhere.
In all, this project took me four days- three to apply the egg shells during every nap time and free second from my kids that I had, and then a fourth to apply the clear coat and let it dry.
I feel like this thing is my fourth child.
I labored over it for days and now it is priceless.
I love decor that's unique, so having a bowl on my coffee table that's covered in egg shells makes me really happy!
Thanks so much Kate for having me! I hope maybe my project will inspire someone else to egg something too!
{Just not a car please.} ;)


How lovely!! I like that & I love your living room!!
ReplyDeleteWow, I admire your perserverance! What a project, especially with little ones around. It truly is unique though and that's what good decor is all about, using things we love.
ReplyDeleteNow that's a project! What an investment in time, but a truly gorgeous final piece! If all my eggshells weren't going into my compost for my potatoes, I would totally try this! :D
ReplyDeleteBrooke, this is genius! I wish I had seen this over the weekend as I made a cake with over 14 eggs (which flopped naturally) and all the egg shells went straight in the bin! I am definitely bookmarking this!
ReplyDeleteWhat a neat idea! So much patience...but, the end product is gorgeous!
ReplyDeleteThis is such a cool idea; what a beautiful bowl! Pinning for sure!! :)
ReplyDeleteThis is gorgeous! My wheels are turning now... on something very small... ;)
ReplyDeleteThanks for sharing!
Adrianne
www.happyhourprojects.com