
Hello all you lovely Chic on a Shoestring Decorating friends!!
Thank you Kate for allowing me to take over your blog today. I'm so excited to share my project!
Let me quickly introduce myself before I begin.
My name is Isabella, but I usually go by Bella :)

I blog over at Bella Before and After and have been blogging for almost 3 years now.
I love food, love to cook, love DIY, love saving money, love all things green, love yoga, love gardening, love creating things, love fixing up my home, love thrift stores, love my family, and kiddos, and so much more, which is why I'm always TRYING to do it all.
I also love decorating cakes, which is why I'm so excited about my new venture. I will be specializing in creating Custom Cake Kits, helping anyone, even you, create a fabulous cake at home. Sounds awesome right? I know, I can't wait :) Come say hi anytime, my NEW website is called Bella's Cake Kits.

Before I get started showing you how I created this beauty, let me show you the disaster that my pantry used to be. I absolutely hate wire shelves in the pantry so much, and this corner pantry was just a DISASTER. They were bending, they were falling out of the walls, and the spacing between shelves was such a waste of space. I hated it. Like REALLY bad.


After living with the pantry like this since moving in about 6 months ago, I simply couldn't take it any more. I just had to fix it, and fast, and without a lot of work, and hopefully without a lot of money.
I'm happy to report the pantry makeover was literally a afternoon project. I started after the kids went to school, and by that evening, my pantry was finished. I kept thinking of different ways to make this corner pantry work, and after driving myself crazy, trying to create the PERFECT pantry, I just scribbled a rough draft on a sheet of paper, took some measurements, and headed to the Home Depot.
I had to make 2 trips total, but all in all, it ended up pretty much the way I had pictured. Only costing just a tad bit more than I planned.
From start to finish, including planning, shopping, and creating I finished everything in one afternoon. After the kids went to school, I started the planning. By noon I was back and tearing the pantry apart.
Here's how I did it :

- Obviously the first thing was to remove those crappy wire shelves.
- Notice the bend in them.

- They were literally falling out of the walls.

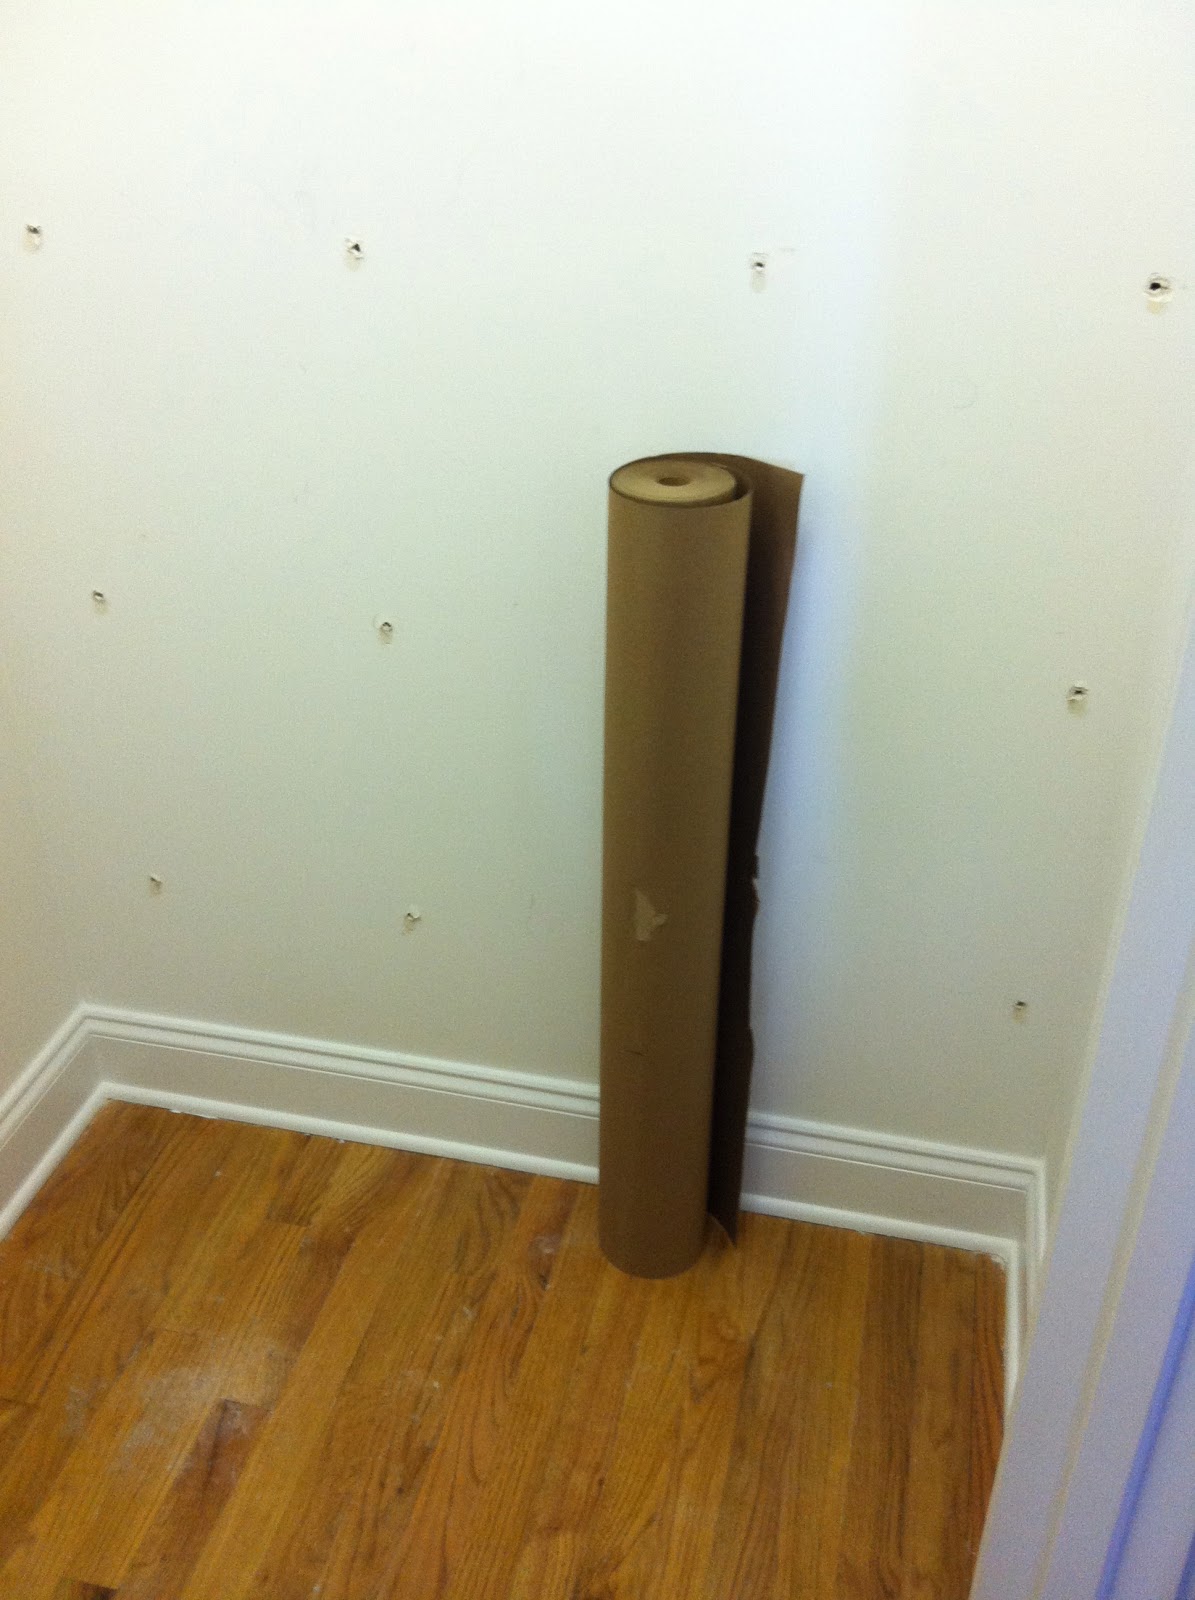
- So I started to remove all the brackets, and of course the walls looked like swiss cheese.

- Is there a proper way to remove those brackets without creating so much damage to your walls? I couldn't figure it out for the life of me. So as frustrating as it was to see my walls so damaged. I had a little trick up my sleeve.
- NO PAINTING, caulking, or patching for me. No way.... didn't have time or the desire for that.
- Remember I wanted this to be a FAST makeover!!

- My secret?
- This lovely drop cloth paper from the paint section at Home Depot.
- It was thick, and cheap.
- Although I wasn't crazy about the color brown, I had envisioned something more "fun" in there, but you know what? It worked!! Beautifully, if I do say so myself. I simply took the roll, and wrapped the walls. I used a regular stapler to attach it to the wall.
- After going up 3 times with the paper, I stopped. I didn't think I needed to go all the way to the ceiling. I have an extra tall ceiling, and there was no wall damage up there anyway.

- These shelf brackets and rails are what cost the most. I could have gotten the cheaper ones, but ended up getting these because the last thing I wanted was my shelves to come crashing down on me. Better be safe than sorry.
- See that bracket at the top? That is extra insurance. The rails snap in there, and that bracket was connected to studs, so I didn't need to worry about finding them for the rails.

- Not going to lie, and say it was a piece of cake, but it was EASY enough. Like I said from start to finish this was an afternoon project. Having those top brackets helped out so much. The rails got screwed into some anchors, and it was time for the shelving.

- Again, I could have saved some money by buying mdf, or cheap plywood, but I coughed up double and went for some nice thick cabinet grade wood. The lovely guys at Home Depot cut those babies up according to my measurements, which fit like a glove :)

- To prevent the shelves from sliding, I tried screwing the brackets to the bottom of the shelves, but it wasn't working out. I'm not even sure if that's what those holes are for. I couldn't get it to work at all. So I decided to try this instead.
- Some thin strips of non slip carpet backing and my shelves didn't budge at all. I know once I put the food on them they wouldn't go anywhere, but this put my mind at ease.

- Here you can see how tall the ceilings are. I did not go to the top with the brown paper, but the shelving does go almost all the way up. I love that I am utilizing that space now.

- I created the longer shelves to have more room between them for larger items.

- While leaving the smaller shelves on the left, spaced just enough to stack my canned goods.

- Here's another shot of the finished pantry!
- I was thinking I might paint the shelves, or line them with contact paper, but as of now, they are still natural. I kind of like the rustic feel of it.
- It may not be the prettiest pantry makeover, BUT let me tell you, it just might be the most practical. I can't even begin to tell you how much room I have in there now.

- I'm sure you want to see it all stocked up right? I don't blame you!!
- Why don't you stop by my blog for an update, I will be posting how I organize my pantry later this week. You won't want to miss it. I'm all about practical here, but I promise it looks pretty awesome if I do say so myself.
- Thanks again Kate for having me over today. This was so fun sharing a DIY post for a change.
- I've been super focused on my 40 day challenge, and trying to get healthy. If you're curious what I'm talking about, you should check out my before pictures of my BODY, now that's a BEFORE picture I never thought I'd share with anyone, but it's turned out to be a blessing.
- I sure hope you stop by to say hi sometime!!


Thank you so much for letting me guest post today. YAY!!!!
ReplyDeleteHugs, Bella
Kate your shelves look good..your hard work paid off...I have to do organize my pantry too...you motivated me.Thanks for sharing. Have a great week. Denise
ReplyDeleteLooks great !! So much more room now, too! I need to learn how to use power tools and do cool stuff like that - usually ask my husband to do that kind of stuff and it sits on his honey do list, haha! : )
ReplyDelete